Here are a few techniques that we use for propagating plants (especially trees):
By seed
Growing a tree from seed takes time, but you will end up with a tree stronger than the same one you could have bought in a nursery. It will be adapted and accustomed to the environment that it will always live in and will have a much healthier and rustic root system.
But many trees grown from seed might not give the same kind of fruit that their parents gave: the taste, size, texture and so on are uncontrollable and that is why we graft (keep reading for more info on grafting). In general, fruit with pips (apple, pear, etc) are not really reliable, while fruit with stones or nuts (apricot, walnut, etc) will give very similar fruit than their parents.
For germinating, some seeds need very specific conditions which we can recreate in a controlled environment to speed up the process.
Scarification is a technique that is used for breaking the outer layer of a seed so it can germinate easier and faster. There are various methods of scarification but we: let the seeds soak for around two days in hot water until they got swollen up to nearly two times their original size. We do this specifically with seeds from Fabaceae plants (Cercis spp, Robinia, etc).
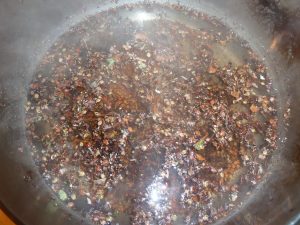
Cercis siliquastrum seeds. The ones that float on the surface are not good
Some other seeds (the majority of seeds from trees in temperate climate) need to be stratified.
Stratification is the process of exposing seeds to a cold and moist (but well drained) environment, which they will need for breaking their dormancy. We put the seeds in layers of sand and in pots (protected from the squirrels with a mesh!) that we keep outside on the north face of the house. We do this for walnut, hazelnut, almond, plum, apricot, peach, service tree…
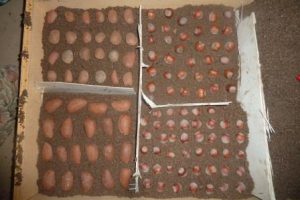
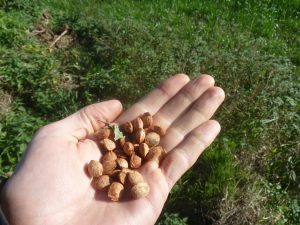
Stratification of almonds and hazelnuts
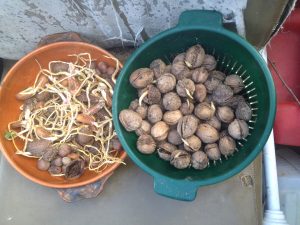
after few month of cold, they are ready to plant ! The almonds (on the left) could have been removed sooner (the roots are already very long). The walnuts (right) are at the right moment to be planted (with the shell that is just opening)
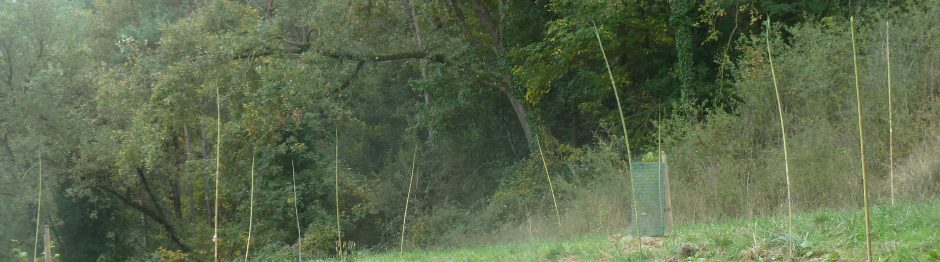
And why not just plant some seeds directly into the ground wherever we think is a suitable place? We have done this especially with walnut and plum seeds, they have a high chance of growing as they grow semi-wild around here.
Plum seeds that we are planting on the land
By cuttings

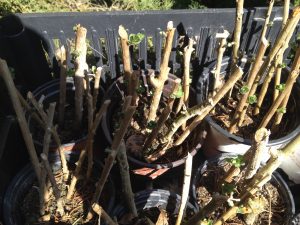
One part of our cuttings bank/tree nursery
We cut young and healthy bits (in general around 20cm making sure we catch enough buds on them) of the plant we wish to propagate and stick them in a pot with a mix of garden soil and sand, and that we keep like this until it makes roots and awakens in spring; then we can transplant it to its definitive place. This technique will change a lot depending on each plant. Here we are just making a lot of experiments to see what works.
In general, the small berry shrubs (raspberry, currants, goji, nanking cherry, etc) work very well by cuttings. Autumn is a good period for cuttings, but again this depends a lot on each plant. Some plants that are frost tender might have to be put inside during the frost period.
For some plants, you can even just bend a branch of the tree and plant it directly in the ground. We do that with goji, figs, raspberries, blackberries, etc.
One of the ways to ensure a better chance of rooting is willow tea. Willow twigs have a rooting hormone and some antiseptical properties that help the cuttings to make roots. For doing that, we cut small pieces of young willow twigs, we put them in boiling water and we leave them covered during at least 24 hours. Then we soak the cuttings in the willow tea for another 24 hours, and then we plant the cuttings in pots.
Cuttings of Goji that are going into leaf in the beginning of March
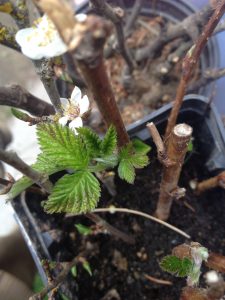
Other cuttings (raspberry, thornless bramble, etc) that are going in leaf and flower
Grafting
For this technique, first you cut a twig of a tree you like. The best time to do it is in the winter, january – february, when the tree is dormant. Then you keep it in sand in a north facing wall, and you keep it a bit moist.
Later on (in general when the rootstock is opening its buds, generally end winter/early spring, but it depends of the tree), you will graft your twig (scion wood) to a tree (rootstock) that is compatible. For exemple, we are grafting Pyrus communis on Pyrus pyraster trees, cherrys on wild cherry trees, apple on hawthorn, etc. This way you are propagating the scion wood identically, you are making a ‘clone’ of the parent tree to ensure production of the fruit you desire. Grafting is also useful for growing trees that would not usually grow in certain environmental conditions but that can be grafted onto rootstock that is hardy to such conditions. For example, here we are grafting chestnuts, which cannot grow in a calcareous soil, onto oak trees, which can.
There are so many techniques of grafting, you can graft buds, twigs to young shoots, twigs to a branch, twigs to a young trunk… The important thing is to connect the cambium of the two entities; and to seal the junction very well after. For sealing we use a mixture of clay, paper and ash that we do ourself.

One technique of grafting (“Whip and Tongue Grafting”), before we cover it with clay
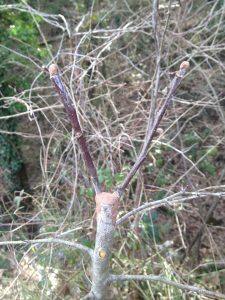
Other type of grafting (“Cleft Grafting”) sealed with our clay mixture
Planting/Transplanting
We also plant trees that we found in nurseries (we bought around 100 fruit/berry trees in October/November 2018). When doing this we recommend buying young bare root trees, they will be more hardy and capable of adjusting to the circumstances they will be living in for the rest of their lives, they will also be cheaper.
As well we are transplanting trees that we found in the forest, to some places that are sometimes more sunny or where there is more space : hawthorn/wild cherry for grafting, walnut planted by squirrels/crows in the forest, plum, service trees, etc…