PAUSE

Our dry-proof forest garden

We are now pausing the project for a little bit.

But the fruits trees will continue to grow and the forest garden will continue to become a jungle !

And the hut is still here in the forest, looking for people to come to rest in it.

Don’t hesitate to contact us for more informations.


Posted in General | Comments Off on PAUSE

Plant propagation techniques

Here are a few techniques that we use for propagating plants (especially trees):

By seed

Growing a tree from seed takes time, but you will end up with a tree stronger than the same one you could have bought in a nursery. It will be adapted and accustomed to the environment that it will always live in and will have a much healthier and rustic root system.

But many trees grown from seed might not give the same kind of fruit that their parents gave: the taste, size, texture and so on are uncontrollable and that is why we graft (keep reading for more info on grafting). In general, fruit with pips (apple, pear, etc) are not really reliable, while fruit with stones or nuts (apricot, walnut, etc) will give very similar fruit than their parents.

For germinating, some seeds need very specific conditions which we can recreate in a controlled environment to speed up the process.

Scarification is a technique that is used for breaking the outer layer of a seed so it can germinate easier and faster. There are various methods of scarification but we: let the seeds soak for around two days in hot water until they got swollen up to nearly two times their original size. We do this specifically with seeds from Fabaceae plants (Cercis spp, Robinia, etc).

Cercis siliquastrum seeds. The ones that float on the surface are not good

Some other seeds (the majority of seeds from trees in temperate climate) need to be stratified.

Stratification is the process of exposing seeds to a cold and moist (but well drained) environment, which they will need for breaking their dormancy. We put the seeds in layers  of sand and in pots (protected from the squirrels with a mesh!) that we keep outside on the north face of the house. We do this for walnut, hazelnut, almond, plum, apricot, peach, service tree…

Stratification of almonds and hazelnuts

after few month of cold, they are ready to plant ! The almonds (on the left) could have been removed sooner (the roots are already very long). The walnuts (right) are at the right moment to be planted (with the shell that is just opening)


And why not just plant some seeds directly into the ground wherever we think is a suitable place? We have done this especially with walnut and plum seeds, they have a high chance of growing as they grow semi-wild around here.

Plum seeds that we are planting on the land


By cuttings

One part of our cuttings bank/tree nursery

We cut young and healthy bits (in general around 20cm making sure we catch enough buds on them) of the plant we wish to propagate and stick them in a pot with a mix of garden soil and sand, and that we keep like this until it makes roots and awakens in spring; then we can transplant it to its definitive place. This technique will change a lot depending on each plant. Here we are just making a lot of experiments to see what works.

In general, the small berry shrubs (raspberry, currants, goji, nanking cherry, etc) work very well by cuttings. Autumn is a good period for cuttings, but again this depends a lot on each plant. Some plants that are frost tender might have to be put inside during the frost period.

For some plants, you can even just bend a branch of the tree and plant it directly in the ground. We do that with goji, figs, raspberries, blackberries, etc.

One of the ways to ensure a better chance of rooting is willow tea. Willow twigs have a rooting hormone and some antiseptical properties that help the cuttings to make roots. For doing that, we cut small pieces of young willow twigs, we put them in boiling water and we leave them covered during at least 24 hours. Then we soak the cuttings in the willow tea for another 24 hours, and then we plant the cuttings in pots.

Cuttings of Goji that are going into leaf in the beginning of March


Other cuttings (raspberry, thornless bramble, etc) that are going in leaf and flower

Grafting

For this technique, first you cut a twig of a tree you like. The best time to do it is in the winter, january – february, when the tree is dormant. Then you keep it in sand in a north facing wall, and you keep it a bit moist.

Later on (in general when the rootstock is opening its buds, generally end winter/early spring, but it depends of the tree), you will graft your twig (scion wood) to a tree (rootstock) that is compatible. For exemple, we are grafting Pyrus communis on Pyrus pyraster trees, cherrys on wild cherry trees, apple on hawthorn, etc. This way you are propagating the scion wood identically, you are making a ‘clone’ of the parent tree to ensure production of the fruit you desire. Grafting is also useful for growing trees that would not usually grow in certain environmental conditions but that can be grafted onto rootstock that is hardy to such conditions. For example, here we are grafting chestnuts, which cannot grow in a calcareous soil, onto oak trees, which can.

There are so many techniques of grafting, you can graft buds, twigs to young shoots, twigs to a branch, twigs to a young trunk… The important thing is to connect the cambium of the two entities; and to seal the junction very well after. For sealing we use a mixture of clay, paper and ash that we do ourself.

One technique of grafting (“Whip and Tongue Grafting”), before we cover it with clay

Other type of grafting (“Cleft Grafting”) sealed with our clay mixture


Planting/Transplanting

We also plant trees that we found in nurseries (we bought around 100 fruit/berry trees in October/November 2018). When doing this we recommend buying young bare root trees, they will be more hardy and capable of adjusting to the circumstances they will be living in for the rest of their lives, they will also be cheaper.

As well we are transplanting trees that we found in the forest, to some places that are sometimes more sunny or where there is more space : hawthorn/wild cherry for grafting, walnut planted by squirrels/crows in the forest, plum, service trees, etc…

Posted in General | Comments Off on Plant propagation techniques

Soil analysis methods we used

First: to observe! Also, asking around, making research, contacting geoligical centre, etc. Like this we found out that the substrate was propably marl (from calcareous soil).

Soil texture

Then the first step is to make holes in the ground and feel the soil. By making it a bit humid and rubbing it between the fingers it’s possible to feel the presence of sand (some granular bits felt in between the fingers), silt (velvety feeling) or clay (very soft and sticky feeling). Some tests can also help, like trying to make ”chips” of soil in between your thumb (it you success the soil is pretty clayey), roll a sausage/donut with humid soil (if you can make a full donut without cracks the soil is very clayey), etc. Finally the best to have a very accurate vision is to put a sample on soil in a jar, shake it and let it settled to see the proportion of sand, silt and clay. This is called the soil texture test.

It’s important to make tests in differents spots. In Fontarnau for example, the two terraces where we are making our forest garden are very different; the top terrace has a much more clayey soil than the bottom terrace.

In this photo we can see that the sausage of soil cracks before we can make a donut out of it (we can just make half a donut). The soil is high in clay but still balanced (top terrace soil).

Jar test results :

The top terrace jar test (on the left) shows a percentage of 48% of clay, 16% of silt and 36% of sand. Looking at a soil texture triangle (you can find them online), you can know that this soil is a clay soil, but not that far from a clay loam soil or a sandy clay soil.

The bottom terrace jar test (on the right) shows a percentage of 37% clay, 24% silt and 39% sand. This soil is a clay loam soil, a bit more equilibrate. However we can remember that our two soils have as well a high percentage of small rocks that balance as well the high clay content.

Another observating tip: a clayey soil will also makes cracks in dry period.

Soil horizons

It’s important to analyse the soil horizon. To do that I dig a 30cm cube hole (that will be useful later on for the drainage test). And I look at the side, I disturb the less with my shovel. Then I can observe if there is different horizontal layers of soil depending on their colour, texture, etc. Looking at the colour of the soil gives an indication on the organic matter content. Generally the top layer might be more dark; it means that it has slightly more organic matter. You can look as well if you see any horizontal lines: they are a sign of soil compaction, like made by a tractor for example.

Soil structure

You can look as well at the soil structure (how the soil particles are binding together – the proportion of aggregates, pods) by looking at the soil horizon patterns, and by handling and mooving big chunks of soil in your hands. Finally you can take all the soil you dig out and throw it on the ground, and then look how the soil react: for example, a massive soil –high clay content- will not fall apart, while a very loose soil (with a high sand content) will completely fall apart without making any aggregates. A good heathly soil structure has a lot of aggregates, with a good balance of micropores and macropores, that help the soil to aerate/host life/keep water and nutrients.

In the top terrace in the summer, we realized that the first 30cm are pretty uniform, even if the top part is slightly more brown and the bottom a bit more grey. We didn’t notice high signs of compactions. The soil structure was pretty nice, with nice aggregates ; indeed the mix of a high clay content and a big presence of around 0,5cm cube rocks gives a good balance for the soil. Note that this soil structure tests might be different when soil is dry or humid.

Earthworm counts

In this 30cm cube of soil that we dug out, it’s interesting to count the amount of earthworms. 20 is a good amount, revelating a good living soil. However, their presence also depends on the humidity of the soil: when we did this test in the summer, with a very dry soil, we didn’t find any earthworms. Then in autumn we did it again and found around 20 of them !

Drainage test

Finally you can fill water in the hole that you dug and look how long it takes to drain out, using any mesuring instrument. If ever it didn’t rain for a while, you can fill the hole, wait 24 hours and fill it again the next day to measure it.  In the top terrace in summer, we realized that the water went 5,2cm down in 15 minutes, 6,5cm in 30 minutes (so only 1,3cm more), and 7,5 in 1 hour (1 cm more). The drainage is a bit slow, but for the climate of Vic it is pretty suitable : indeed, the winter (from december to march) is the most dry period, and then the soil don’t get asphyxied by waterlogging situations, and in the same time it retains the water from the autumn rains pretty well during all these months. The big spring rains are then helping the soil to retains water through the summer, of course with a good and thick mulch.

Bio-indicator plants

As well, a good way of analysing the soil is by observing the plants that are the most present on it already. These plants can indicate a special type of soil.

For example in the bottom part of the top terrace , we noticed a lot of Potentilla reptans, that is a sign of compaction in clayey soil. As well we could notice (more sparsely) some Plantago major that also indicates this phenomena. The other parts of the terrace were more rich in Plantago lanceolata and Stellaria media, that are sign of a pretty healthy soil.

Potentilla reptans in the top terrace

The bottom terrace didn’t have Potentilla but a lot more of Stellaria media. It also had a lot of Amaranth, that shows a nitrogen-rich soil. In general the bottom terrace seems more equilibrate.

It’s important to keep in mind that one plant doesn’t indicate much. The best is to try to calcutate the proportion of each plant on the soil to be sure they really can be representative of the soil.


pH Test

It is important to know the pH of our soil, at least roughly. You can buy a pH test in a garden center or give a soil sample to a laboratory. You can also make more DIY techniques like using a red cabbage, or the one we used, by drying the soil and pouring some white vinegar on it.

It bubbles! And quite a lot. This means that the soil is calcareous and reacts with the vinegar. We know then that our soil is alkaline. We should make further tests to know the exact pH of our soil.

If your soil doesn’t bubble, then try to make it a bit humid and poor sodium bicarbonate on it. If it reacts, your soil will be acid. If it doesn’t, your soil will be neutral.

Posted in General | Comments Off on Soil analysis methods we used

Main plants used in our forest garden

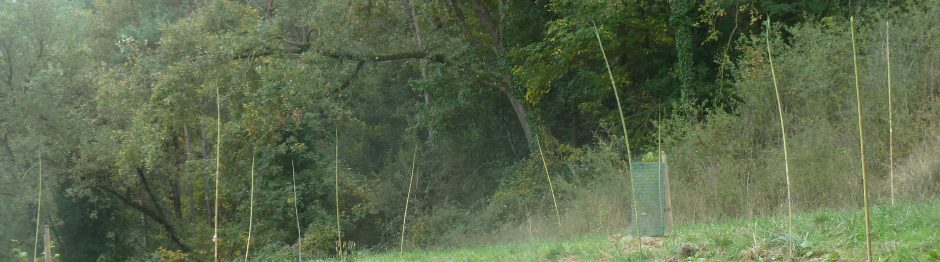
It’s not an exhaustive list but it gives an idea of the diversity that we have in our forest garden project.

The latin names that are orange mean that these are plants that we found in the wild in Fontarnau. This is just a few examples of the wild plant we use for eating and medicinal purpose. In fact sharing about wild plants uses is really our passion. There is so much more plants that we can see as valuable ! In fact, any forest is already a food forest ! Here in fontarnau we can base our diet with plants with extraordinary nutritionnal value like oak (acorns), jerusalem artichoke, roots from lots of plants, especially from the Asteraceae family (Cirsium, Scorsonera, Tragopogon, Arctium spp. etc), leaves like nettlle, amaranth, fat-hen, etc.

We are a bit lazy still but the idea would be to have the name in latin/english/spanish/catalan/french, and to put always a little description of why we use each plants.


TREES

Quercus pubescens (syn. Quercus humilis). Downy Oak [en], Roble pubescente [es], Roure Martinenc [cat], Chêne pubescent [fr]. We collect the acorns that we cook a bit like chestnut. Very healthy and nutritive.

Quercus ilex. Holm Oak [en], Encina [es], Alzina [cat], Chêne vert [fr]. Edible acorns.

Tilia spp. Lime tree [en], Tilo [es], Til-ler [cat], Tilleuls [fr]. Edible leaves, flowers very good in medicine

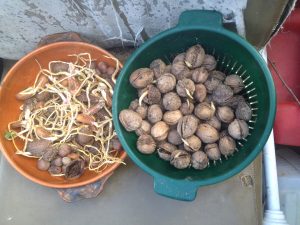
Juglans regia: Walnut [en], Nogal [es], Noguera [cat], Noyer [fr]. Grow semi-wild here.

Arbutus unedo: Strawberry tree [en],  Madroño [es], Arboç [cat], Arbousier [fr]

Prunus domestica: Plum tree [en], Ciruelo [es], Prunera [cat], Prunier [fr]. Grow semi-wild here.

Ficus carica: Fig tree [en], Higuera [es], Figuera [cat], Figuier [fr]. Grow semi-wild here.

Sorbus domestica: Service tree [en], Serbal [es], Servera [cat], Cormier [fr].

Prunus avium: Wild Cherry [en], Cerezo silvestre [es], Cirerer silvestre [cat], Merisier [fr]. Edible cherry (a bit small) and leaves. We also have domesticated forms.

Crataegus azerola: Azarole [en], Acerolo [es], Atzeroler [cat], Azerolier [fr].

Crataegus monogyna: Hawthorn [en], Espino [es], Arç blanc [cat], Aubépine [fr]. Good medicinal plant, the berry and the leaves can be eaten. Got rootstock, especially for medlar.

Diospyros kaki: Persimon [en], Caqui [es], Kaki [cat], Kaki/Plaqueminier [fr]

Malus domestica: Apple [en], Manzano [es], Pomera [cat], Pommier [fr]

Pyrus domestica: Pear [en], Peral [es], Perera/perer [cat], Poirier [fr]

Pyrus pyraster: Wild Pear [en], Peral silvestre [es], Perera silvestre [cat], Poirier sauvage [fr].

Mespilus germanica: Medlar [en], Nispero [es], Nespler [cat], Néflier [fr]

Eriobotrya japonica: Loquat [en], Nispero japonès [es], Nesprer del Japo [cat], Néflier du Japon/Bibacier [fr]

Ziziphus jujuba: Jujube [en], Azufaifo [es], Ginjoler [cat], Jujubier [fr]

Cydonia oblonga: Quince [en], Membrillo [es], Codonyer [cat], Cognassier [fr].

Prunus dulcis: Almond [en], Almendro [es], Atmetller [cat], Amandier [fr].

Coryllus avellana: Hazelnut [en], Avellano [es], Avellaner [cat], Noisetier [fr].  The leaves as well are edible.

Prunus armeniaca: Apricot tree [en], Albaricoque [es], Albercoquer [cat], Abricotier [fr]

Olea europaea: Olive tree [en], Olivo [es], Olivera [cat], Olivier [fr].

Punica granatum: Pomegranate [en], Granado [es], Magraner [cat], Grenadier [fr]

Acca sellowiana: Feijoa [en, es, cat, fr], guayabo del pais [es], Goyavier du Bresil [fr]

Etc…

Other interesting useful trees:

Acer spp. Maple [en]. Edible leaves.

Pinus sylvestris. Pine [en], Pino sylvestre [es], Pi Roig [cat], Pi sylvestre [fr]. Edible seed and buds; and you can make a bread out of the dry cambium (we never tried it yet).

Picea abies. European spruce [en], Picea comun [es], Avet roig [cat], Epicea [fr]. In spring, you can eat the young leaves that are not hard yet and nicely lemony tasting. You can make a sirop out of it by layering leaves and sugar in a jar and let the sugar melt.

Fraxinus Excelsior. Ash Tree [en],  Fresno comun [es], Freixer [cat], Frêne [fr]. Edible leaves and buds. In france people used to make a traditionnal alcoholic drink out of the leaves/honey secreted by the aphids on the leaves call “Frênette”.


SMALL TREES / SHRUB

Asimina triloba. Pawpaw [en, es, cat], Asimina [es], Asiminier [fr]. Edible fruit.

Elaeagnus x ebbingei or submacrophylla. Chalef d’Ebbing [fr]. Edible fruit. [Nitrogen fixer]

Elaeagnus Angustifolia. Russian olive [en], Arbol del paraiso [es], Arbre del paradis [cat], Olivier de bohême [fr]. Edible fruit, taste a bit like dates. [Nitrogen fixer]

Hippophae Rhamnoides. Sea buckthorn [en], Espino amarillo [es], Arç groc [cat], Argousier [fr]. Edible fruit. [Nitrogen fixer]

Berberis Darwinii. Michay [en], Epine-vinette de Darwin [fr]. Edible fruit.

Cornus mas. Cornelian cherry dogwood [en], Cornejo macho [es], Corneller mascle [cat], Cornouiller mâle [fr]. Edible fruit.

Sambucus nigra. Elderberry [en], saúco negro [es], saüc [cat], sureau [fr]. Edible berry and flowers.

Prunus spinosa. Blackthorn [en], Endrino [es], Aranyoner [cat], Prunellier [fr]. Edibe berry (but very astringent, better if kept frozen for a while)

Etc…


SMALL SHRUBS / BUSHES

Rubus idaeus: Raspberry

Rubus fruticosus. Bramble. Edible berry and leaves

Ribes rubrum: Redcurrant

Ribes nigrum: Blackcurrant

Ribes uva x crispa

Prunus tomentosa: Nanking cherry

Lycium barbarum: Goji

Rosa canina. Dog rose

Juniperus communis. Juniper

Etc…


HERBACEOUS PERENNIALS

Chicorium intybus. Chicory

Asparagus officinale. Asparagus

Helianthus tuberosum. Jerusalem Artichoke

Cynara cardunculus. Cardon

Fragaria vesta. Strawberry. Good ground cover.

Urtica dioica. Nettle

Allium cernuum

Allium tuberosum

Allium schoenoprasum

Asphodelina luthea

Malva sylvestris. Edible flowers/leaves/seeds

Hemerocalis spp. Edible flowers

Glycyrrhiza glabra. Liquorice

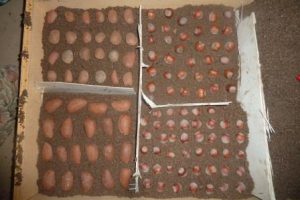
And MANY more !! We are currently sowing a lot of perennial vegetables on the land.


 Plus all other wild plants that we use from time to time for cooking/medicine :

Plantago major/lanceolata. Good in salad and we use it against skin inflammation

Taraxacum Officinale. Dandelion.

Achillea Millefolium. Yarrow. We use it against wounds (very good cicatrising, anti-inflammatory etc)

Chenopodium Album. Goosefoot.

Etc…


CLIMBERS

Vitis vinifera. Grape vine

Header helix. Ivy. Good for making soap.

We are activelly looking for Kiwi and Passiflora; bring some to us !


MUSHROOMS

They aren’t plants but they are completely part of our forest garden.

We want to cultivate mushrooms, but we wait for the spring to start inoculating logs.

Wild mushrooms that we found in the forest of Fontarnau :

Camagroc [cat]

Lactarius deliciosus: Rovellon [cat]

Lengua de bou [cat]

Peu de rata [cat]

Llenega [cat]

Fredolic [cat]

Suillus spp.

Etc…

Posted in General | Comments Off on Main plants used in our forest garden